I give this F-35 package from NitroPlanes an A+! It comes 95% pre-built with high quality electronics already installed. There is lots of thrust to spare with the 64mm ducted fan unit powered by a screaming 14 brushless inrunner motor.
 
It's controlled by a unique elevator-aileron mix so it has maximum stability and maneuverability at all speeds. It has it all; low price, high quality, its strong, scale, stable, maneuverable, everything, it's all there. That's why I give this one an A+!


RCUniverse.com
Loading Image...


Review by: Sunil Kumar

Nitro Planes
13240 Amar Rd
City of Industry, CA 91746

Email: support@nitroplanes.com

Website:
http://www.nitroplanes.com

Phone:
626.968.9860


Video Review
CLICK HERE to Watch


  • Quick Assembly
  • Complete kit
  • Fun to fly
  • Vague Instructions
  • Control push rod was assembled wrong
  • Nose gear comes loose

Exeed-RC has some innovative and inexpensive RTF (Ready to Fly) electric duct fan jet models. They include an F-4, F-18 and an F-35. This review will look at the F-35 which Nitro Planes claims to be the "The Fastest 64mm EDF Jet in the Market!".


SPECIFICATIONS:


  • 8 "AA" Batteries
  • Pliers, Phillips Screwdriver
  • 5 Minute Epoxy (optional)
  • Paper
  • Stir Sticks
  • 1/16 Inch Drill Bit
Packaging
This is the RTF version
Well packaged
The box comes well packaged. Everything is included. The RTF version even includes a transmitter, LiPo battery and LiPo charger.
Package Contents
64mm EDF and ESC
Nosewheel Steering Servo

The fuselage has all the components installed, including 3 servos, an ESC (electronic speed control) and the EDF (electric duct fan) with brushless motor. Take a minute to check the screws holding the control arms and the linkage on the nosewheel. You may also need to stuff the servo wires back into the groves and under the tape in front of the EDF unit.

Control Hardware
Comes with graphics applied
Right Servo

The kit comes complete with hardware. There are only enough control horn screws (the smaller ones) for 2 screws per control horn. Two screws did hold the horn securely. The graphics look very nice and follow the full scale plane.

The business end
Included hardware
Plastic Parts

Looking up the business end you can see the brushless motor and EDF unit. The nose cone and exhaust dress the airplane up nicely.

Wings and things
LiPo Battery and Charger
Instruction Manual
The LiPo charger comes with a cord that clips onto the leads of a 12 volt battery so you can charge it at the field. I used my field box battery to charge the LiPo with no problems. The instruction manual is generally vague about assembly, but the pictures in this review should clear up any questions.
Step 1: Glue the nose on
Install the canopy, some T-pins may help keep the canopy from bowing out
The Nitro Planes web site says to skip the included contact cement, but I choose to use it. I would recommend 5 minute epoxy if you decide not to use the contact cement. Save the unused epoxy for field repairs. You will also need to use low tack tape or T-pins to keep the parts from shifting while drying. When gluing on the canopy on I used 4 small dabs of glue. This will makes removal of the canopy easier if access to the steering servo is needed.
Install the nose gear
Install the main gear
Not the wings have a darker gray on the top
When installing the nose gear, install the side with the flat to the screw. I would recommend some thread locker on both screws that hold the nose gear to the plane. The main gear installs easily, just be sure to install them on the correct side. Notice the tails and wings have different colors on the top and bottom. The darker color should be installed on the top side.
Glue the wings on
Install the elevators, be sure to use glue!
A stir stick can help spread the glue out. When installing the elevators, first press the hinges into the foam all the way and test fit the piece. Then pull them out and final install them with glue. Be careful not to get glue on the joint of the hinge.
Glue the exhaust on
Enlarge the hole in the servo arm
Control horn came attached to the pushrod backwards
The manual didn't include a step to install the exhaust, but I put some glue dabs on it and pressed it onto the fuselage. You will need a 1/16 inch diameter drill bit to enlarge the hole in the servo arm for the pushrod. Notice the control horn for the aileron is installed backwards. Just unscrew it from the pushrod. Be sure after you install it that you put some glue over the nut to keep it from backing out.
Pushrod setup. Also note the hidden compartment for extra servos with the servo extension installed
Glue the rudder on
Make sure to get some glue on the sides
The manufacturer has included a hidden compartment in case you want to have separate servos for the elevators and the ailerons. Out of the box the transmitter has mixing so the rear elevators are actually elevons (elevators and ailerons). The included pushrods move the ailerons the same direction as the elevators. When gluing the rudder on be sure to get some glue on the sides to give the rudder some stiffness.
Only enough for 2 screws per control horn
Ready to fly
Hardware is included for a 5 servo setup
The kit included 2 screws for each control horn even though the control horns have 4 holes. The 2 screws (installed diagonal to each other) held the horn securely. The kit includes hardware in case you want to install 2 more servos. The transmitter has a dual rates switch for the ailerons and 3 LED's to let you know the battery status.
Included LiPo and charger takes 2 hours to fully charge
Some tape on the fan hatch will keep secure in flight

The included LiPo charger took about 2 hours to charge this 1300 mAh LiPo. Do not leave the battery charging unattended and unplug it when the charge is complete. The charger has a green LED to indicate that the charger is still working. When the Green LED goes out, the battery is fully charged. Before flying the airplane check the C.G. (Center of Gravity).

Overall the kit comes complete and little assembly is required. The total time building before you hit the field will be about 1 hour.


All up weight came in at 22 oz. Prior to the first flight I measured the thrust to be 16 oz at full throttle. The Density Altitude was around 800 feet with a temperature of 71 degrees F and an altimeter setting of 29.97 in Hg. With a static thrust to weight ratio of 0.72, the F-35 should have great climb performance.

The brushless motor and included battery were tested with a Hyperion E-meter and the results are below:

E-Meter Test Results

Approximately 50% throttle
100% Throttle
Volts:
11.52
11.25
Amps:
11.3
31.2
Watts:
130
329
RPM:
25,200
37,200

Before flying the F-35 at the field I wanted to know what kind of flight times that I could expect from the 1300 mAh battery. At full throttle the F-35 cut the engine off at just over 2 minutes and produced 16 oz of static thrust. At 1/2 throttle on the F-35 lasted much longer at 7 minutes producing 8 oz of thrust.

The transmitter has a high/low rates switch. For the first flight you will want to have the control throws on "low". I would recommend high rates after you have had a few flights of experience with this airplane. The book gives no information on control throws but the settings I used in this review were:

Control Throws
 
LOW
HIGH

Ailerons:
0.2"
0.9"
Up
0.2"
0.4"
Down
Elevator:
0.4"
0.9"
Up
0.4"
0.6"
Down

No Problem Grass Takeoff
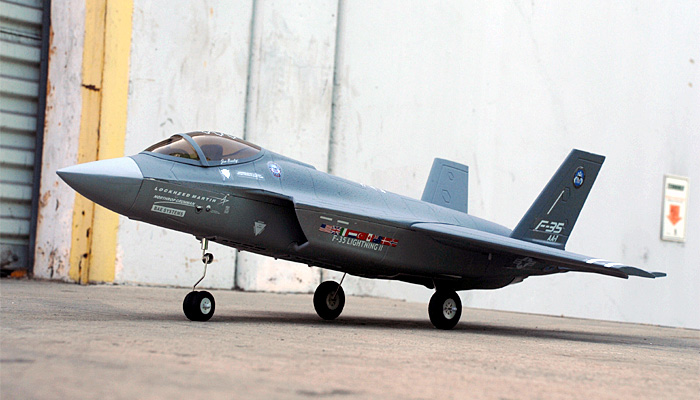
The F-35 can climb!

The first flight was a ROG (Rise Off Ground) takeoff from the grass strip. The field was hard packed and the grass was short. This model will take off from grass but would be much more comfortable flying from pavement. To save the battery I put the F-35 in the middle of the runway and checked the runway for the smoothest takeoff line.

Advancing the throttle the model accelerated quickly as can seen in the video. The climb out was excellent with only marginal trim required in roll. This thing is FAST! I quickly reduced to just below 1/2 throttle. The F-35 cruises comfortably at 1/2 throttle, but for aerobatics you will need higher throttle settings.

The control responses are excellent even at "Low" rates. The F-35 is not difficult to fly, but it is easy to over control and is fast. Flying this plane with a transmitter strap and your thumb and finger is recommended for more precise control. This planes does go where you point it.

On high rates the roll rate is very fast (something on the order of 720 degrees per second (or 2 rolls per second). The airplane rolls straight with no tendency drop the nose. As can be expected from an airplane with a short wing span and no dihedral, there is no "self righting tendency". This makes the airplane very fun to fly.

The pitch is very responsive at speed. The model requires just a bit of elevator in the turn especially at lower speeds. This can be tweaked with fine tuning the C.G.

This model doesn't have any rudder control (the nosewheel is controlled by the rudder stick for steering on the ground) so don't expect IMAC maneuvers from it. It will do all the basic maneuvers such as rolls and loops. Try to avoid any managers that may get it to spin since there are no rudders. I found that when the plane got too slow if I dropped the nose it would recover.

When landing I liked to cut the throttle completely and glide in. With the trim set for 1/2 throttle cruise it would fly a nice power off approach with little or no flare needed for landing.

Approach to Landing
Realistic in-flight looks

Although not a park flyer, you can fly this plane at smaller fields. I would recommend a bigger area than your local ball park because this jet does eat up sky quickly. To fly this airplane in smaller fields keep your throttle settings low and your speed down. If you fly in low light or near dusk you may want to paint the bottom of the airplane white. With the gray on gray paint scheme this model can be difficult to see in low light conditions.

The nose gear came loose after a few flights. A quick turn with the Allen key will tighten it back up. Some red thread locker will keep the screw from coming loose. Be careful not to over tighten the stop screw because the coupling that holds the nose gear on is made from aluminum and will strip easy.

The airplane has very realistic in-flight looks. At the field everyone stopped working on their planes to watch this model tear the sky up. The fan noise combined with the realistic looks makes flying this airplane a unique experience.

At the field...


The Exceed-RC F35 sold by Nitro Planes is a great value. The kit comes complete and in less time then it takes to charge the battery you can assemble the plane. You will want to take this one to the field before the glue is dry! The F-35 can be handled by intermediate and experienced pilots alike. The flight characteristics are very jet like since this model goes where you point it. It's realistic looks and EDF sound will have everyone at your field taking notice of the new jet jock on the flight line


Make a Free Website with Yola.